Using this option can make it easier for users to navigate around Windows and this will protect them from accidental use of touchpad when using a USB mouse. So without wasting any time let’s see How to Automatically disable Touchpad when Mouse is connected in Windows 10 with the help of the below-listed guide.
Disable Touchpad when Mouse is connected in Windows 10
Make sure to create a restore point just in case something goes wrong.
Disable Touchpad when Mouse is connected in Windows 10 Method 1 – Disable Touchpad through Settings Method 2 – Disable Touchpad when Mouse is connected using Control Panel Method 3 – Disable Touchpad when Mouse is connected via Registry
Method 1 – Disable Touchpad through Settings
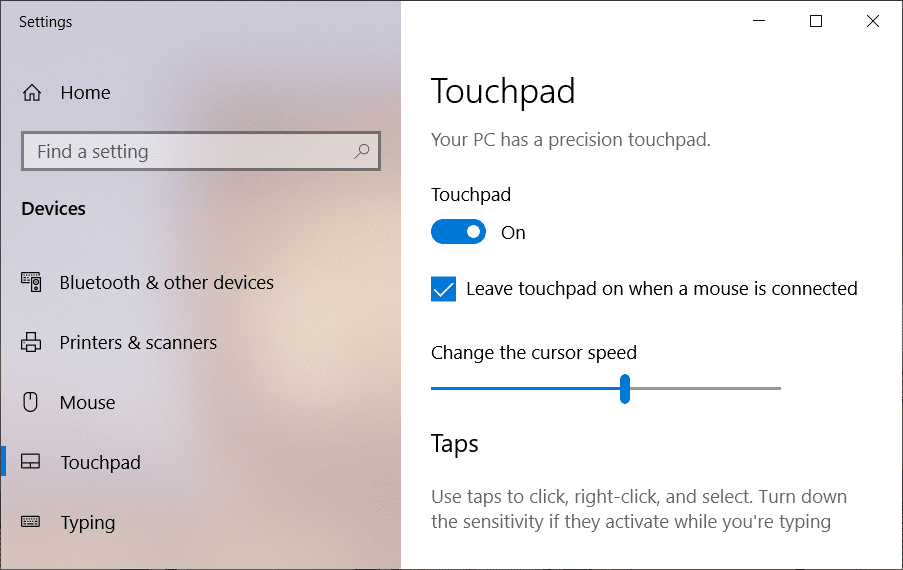
1.Press Windows Key + I to open Settings then click on Devices.
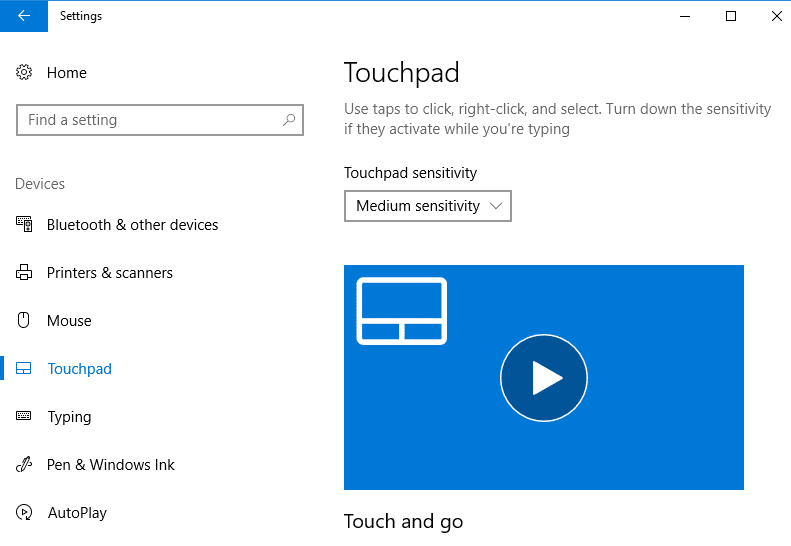
2.Now from the left-hand menu click on Touchpad.
3.Under Touchpad uncheck “Leave touchpad on when a mouse is connected“.
4.After completing these steps, the touchpad will be disabled automatically whenever you connect a mouse. Note: Under the setting option you will get this option only when you have the precision touchpad. If you do not have that touchpad or other touchpads on your system, you need to use another method.
Method 2 – Disable Touchpad when Mouse is connected using Control Panel
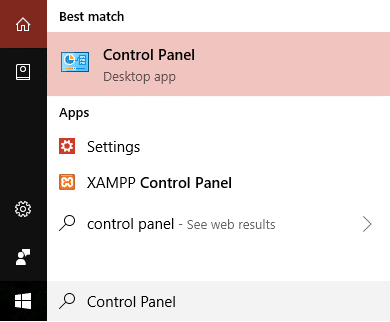
1.Type control panel in Windows Search then click on Control Panel from the search result.
2.Next, click on Hardware and Sound.
3.Under Devices and Printers click on Mouse.
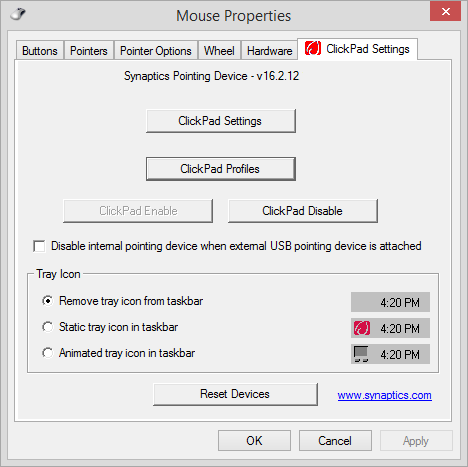
4.Switch to ELAN or Device Settings tab then uncheck “Disable internal pointing device when external USB pointing device is attached” option.
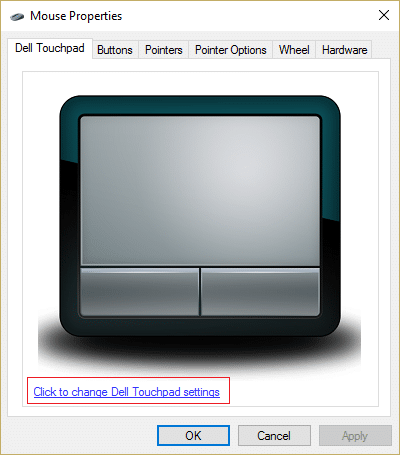
5.Click Apply followed by OK. Note: You need to understand that for some touchpad devices you won’t be able to find the above device settings or ELAN tab. This is because the touchpad manufacturers bury the above settings inside their own software. One such example is if you’re using a Dell laptop then you will need to use Dell’s support software to disable touchpad when mouse is connected in Windows 10. 1.Press Windows Key + R then type main.cpl and hit Enter to open Mouse Properties.
2.Under Dell Touchpad tab click on “Click to change Dell Touchpad settings“.
3.From Pointing Devices select the Mouse picture from the top. 4.Checkmark “Disable Touchpad when USB mouse is present“.
Method 3 – Disable Touchpad when Mouse is connected via Registry
This is another method which will help you to disable the touchpad when you connect a mouse. 1.Press Windows key + R and type regedit and hit Enter.
2.Once the Registry Editor opens, you need to navigate to the following path: HKEY_LOCAL_MACHINE\SOFTWARE\Synaptics\SynTPEnh 3.Now you need to right-click on DisableIntPDFeature under the right window pane and select Modify.
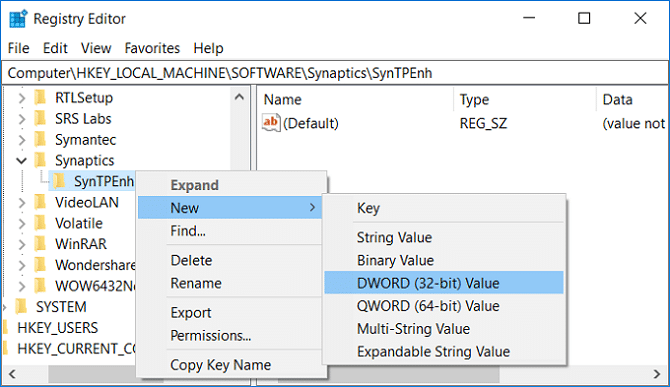
Note: If you can’t find DisableIntPDFeature DWORD then you need to create one. Right-click on SynTPEnh then select New > DWORD (32-bit) value.
4.Name this DWORD as DisableIntPDFeature and then double click on it to change its value. 5.Make sure that Hexadecimal is selected under Base then change its value to 33 and click OK.
6.Reboot your PC to save changes. Hopefully, you can get your task done by adopting any one of the above-mentioned methods. However, depending on the device, the methods can be different. On some devices, you can find out the first method to be implemented to get your task done. While in other devices you may not find this option. Therefore, we have mentioned 3 Methods so that depending on your requirements, you can choose the method that works for you. All you need to do is follow the above-mentioned steps systematically. Recommended:
How to Use OneDrive: Getting Started with Microsoft OneDrive Fix Desktop Window Manager High CPU (DWM.exe) How to Set Auto Shutdown in Windows 10 How to Disable Windows 10 Firewall
I hope this article was helpful and you can now easily Disable Touchpad when Mouse is connected in Windows 10, but if you still have any questions regarding this tutorial then feel free to ask them in the comment’s section.
