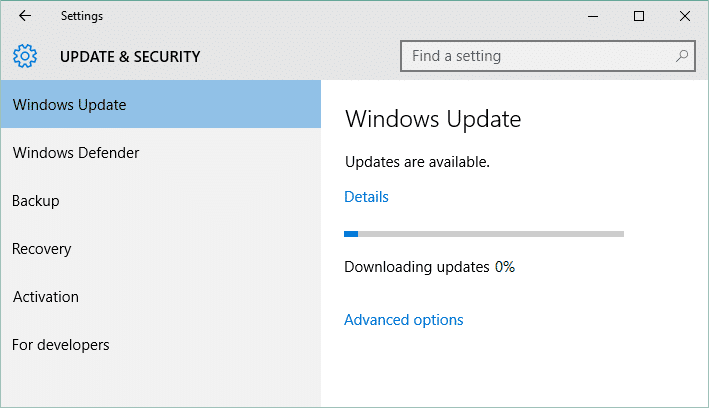
Windows update is an essential feature which makes sure Windows receives critical security updates to protect your Computer from security breach such as recent WannaCrypt, Ransomware etc. But if you’re not able to download the latest updates, then this might be a problem which needs to be fixed as soon as possible. So without wasting any time let’s see How to Fix Windows Update Stuck at 0% with the help of the below-listed troubleshooting guide.
Fix Windows Update Stuck at 0% [SOLVED]
Note: Make sure to create a restore point just in case something goes wrong.
Fix Windows Update Stuck at 0% [SOLVED] Method 1: Disable all Non-Microsoft services (Clean boot) Method 2: Rename SoftwareDistribution Folder Method 3: Temporarily Disable Antivirus Software and Windows Firewall Method 4: Run CCleaner and Malwarebytes Method 5: Run Windows Update Troubleshooter Method 6: Delete SoftwareDistribution Folder
If you have already tried waiting for a few hours then without hesitating to follow the below methods, your Windows updates are definitely stuck.
Method 1: Disable all Non-Microsoft services (Clean boot)
Press the Windows Key + R button, then type msconfig and click OK.
Under General tab under, make sure Selective startup is checked.
Uncheck Load startup items under selective startup.
Switch to the Service tab and checkmark Hide all Microsoft services.
Now click Disable all button to disable all the unnecessary services which might cause conflict.
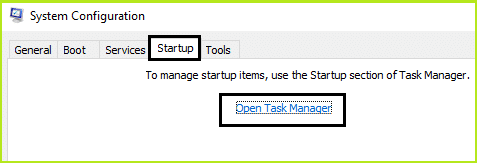
On the Startup tab, click Open Task Manager.
Now, in the Startup tab (Inside Task Manager) disable all the startup items which are enabled.
Click OK and then Restart. Now again try to Update Windows and this time you will be able to update your Windows successfully.
Again press the Windows key + R button and type msconfig and hit Enter.
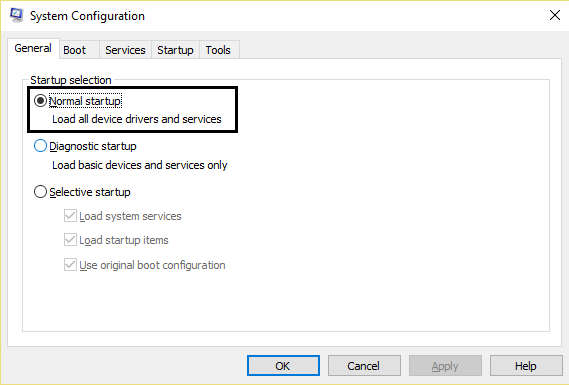
On the General tab, select the Normal Startup option and then click OK.
When you are prompted to restart the computer, click Restart. This would definitely help you Fix Windows Update Stuck at 0%.
Method 2: Rename SoftwareDistribution Folder
Open Command Prompt. The user can perform this step by searching for ‘cmd’ and then press Enter.
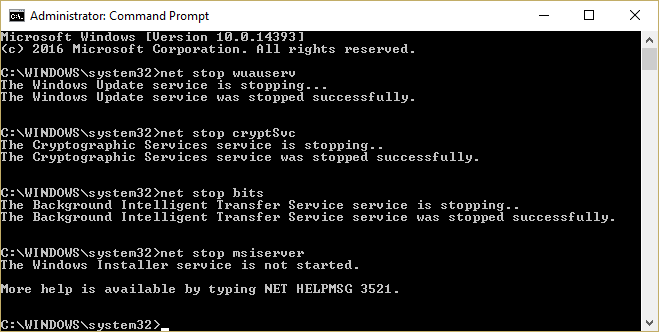
Now type the following commands to stop Windows Update Services and then hit Enter after each one: net stop wuauserv net stop cryptSvc net stop bits net stop msiserver
3 . Next, type the following command to rename SoftwareDistribution Folder and then hit Enter: ren C:\Windows\SoftwareDistribution SoftwareDistribution.old ren C:\Windows\System32\catroot2 catroot2.old
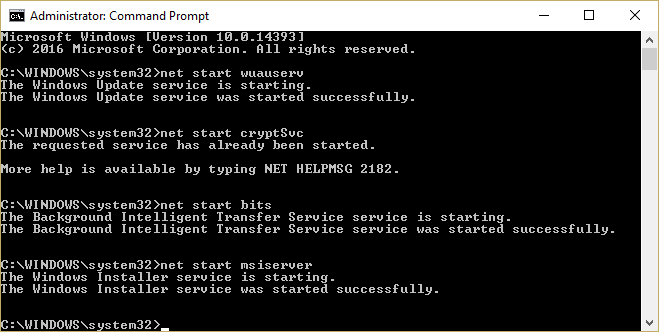
Finally, type the following command to start Windows Update Services and hit Enter after each one: net start wuauserv net start cryptSvc net start bits net start msiserver
Reboot your PC to save changes.
Method 3: Temporarily Disable Antivirus Software and Windows Firewall
Sometimes the Antivirus program can cause an error and to verify this is not the case here. You need to disable your antivirus for a limited time so that you can check if the error still appears when the antivirus is off.
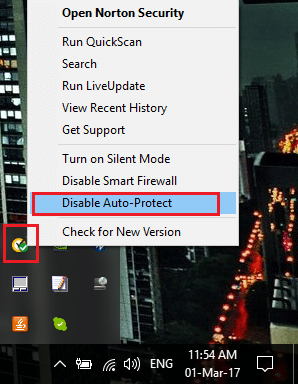
- Right-click on the Antivirus Program icon from the system tray and select Disable.
2. Next, select the time frame for which the Antivirus will remain disabled.
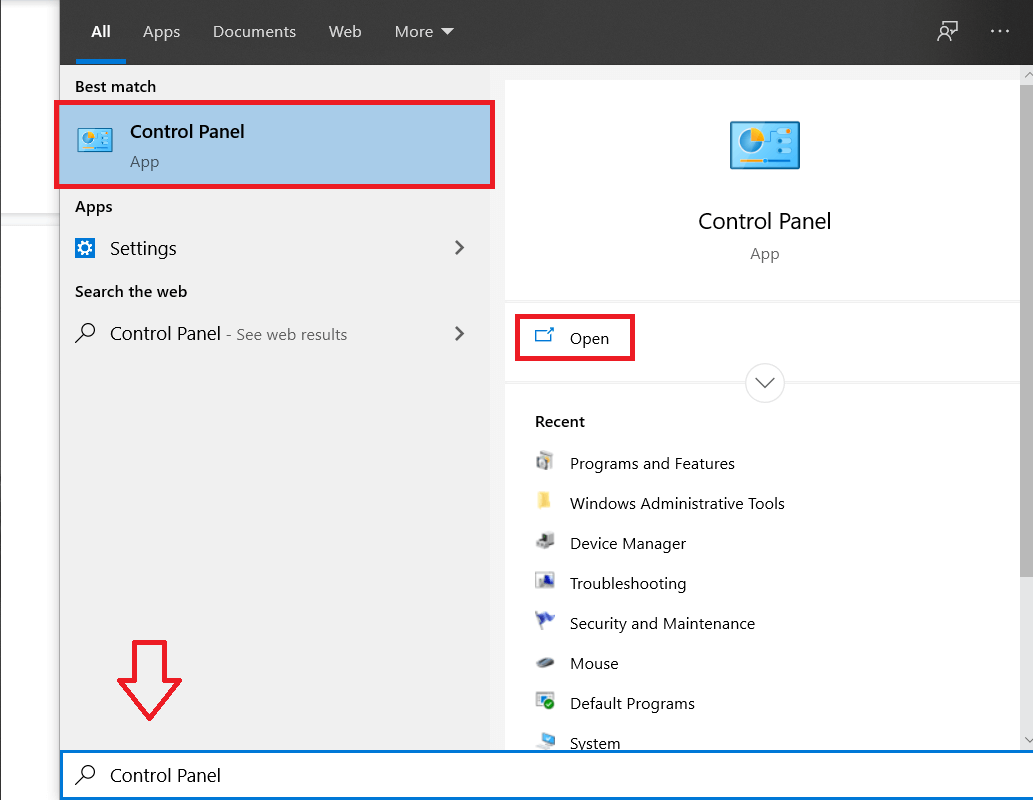
Note: Choose the smallest amount of time possible, for example, 15 minutes or 30 minutes. 3. Once done, again try to connect to open Google Chrome and check if the error resolves or not. 4. Search for the control panel from the Start Menu search bar and click on it to open the Control Panel.
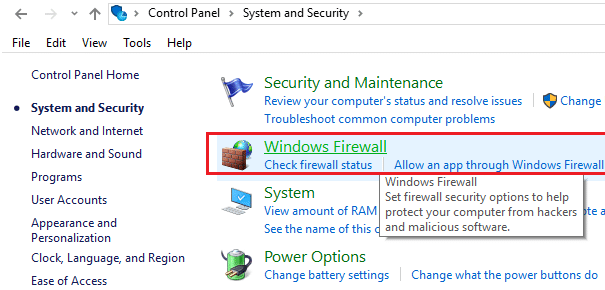
Next, click on System and Security then click on Windows Firewall.
Now from the left window pane click on Turn Windows Firewall on or off.
7. Select Turn off Windows Firewall and restart your PC.
Again try to open Google Chrome and visit the web page, which was earlier showing the error. If the above method doesn’t work, please follow the same steps to turn on your Firewall again.
Method 4: Run CCleaner and Malwarebytes
Download and install CCleaner & Malwarebytes. 2. Run Malwarebytes and let it scan your system for harmful files. If malware is found, it will automatically remove them.
Now run CCleaner and select Custom Clean.
Under Custom Clean, select the Windows tab and checkmark defaults and click Analyze.
5. Once Analyze is complete, make sure you’re certain to remove the files to be deleted.
Finally, click on the Run Cleaner button and let CCleaner run its course.
To further clean your system, select the Registry tab, and ensure the following are checked:
Click on the Scan for Issues button and allow CCleaner to scan, then click on the Fix Selected Issues button.
When CCleaner asks “Do you want backup changes to the registry?” select Yes.
Once your backup has completed, click on the Fix All Selected Issues button.
Restart your PC to save changes.
Method 5: Run Windows Update Troubleshooter
Search for the control panel from the Start Menu search bar and click on it to open the Control Panel.
Type troubleshooting in the search bar then click on Troubleshooting.
Next, from the left window, pane select View all.
Then from the Troubleshoot computer problems list select Windows Update.
Follow on-screen instruction and let the Windows Update Troubleshoot run.
Restart your PC and again try to install Updates which were stuck.
Method 6: Delete SoftwareDistribution Folder
Press Windows Key + R then type services.msc and hit Enter.
Right-click on Windows Update service and select Stop.
Open File Explorer then navigate to the following location: C:\Windows\SoftwareDistribution
Delete all the files and folders under SoftwareDistribution.
Again right-click on Windows Update service then select Start.
Now to try to download the updates which were stuck earlier. Recommended:
Fix Microsoft Compatibility Telemetry High Disk Usage in Windows 10 Fix System icons not showing on Windows 10 Taskbar How to Fix NVIDIA Control Panel Missing in Windows 10 Fix Integrated Webcam Not Working on Windows 10
That’s it you have successfully Fix Windows Update Stuck at 0% but if you still have any queries regarding this post then feel free to ask them in the comment’s section.
